RUNE Interface - Getting Started
RUNE Interface is the graphical application for creating and editing R.U.N.E. – Routing & Utility Node Editor flows. This guide will help you get started.
Installation
- Download RUNE Interface from itch.io or blazium.games.
- Extract the archive to your desired location
- Run the executable
First Launch
When you first launch RUNE Interface, you'll be prompted to configure:
- Cache Directory: Where RUNE stores temporary files and execution records
- Flows Directory: Where your flow files are stored
These directories can be changed later in the settings.
Creating Your First Flow
- Click "Create Flow" on the startup screen
- Enter a name for your flow
- The editor will open with an empty canvas
The Interface
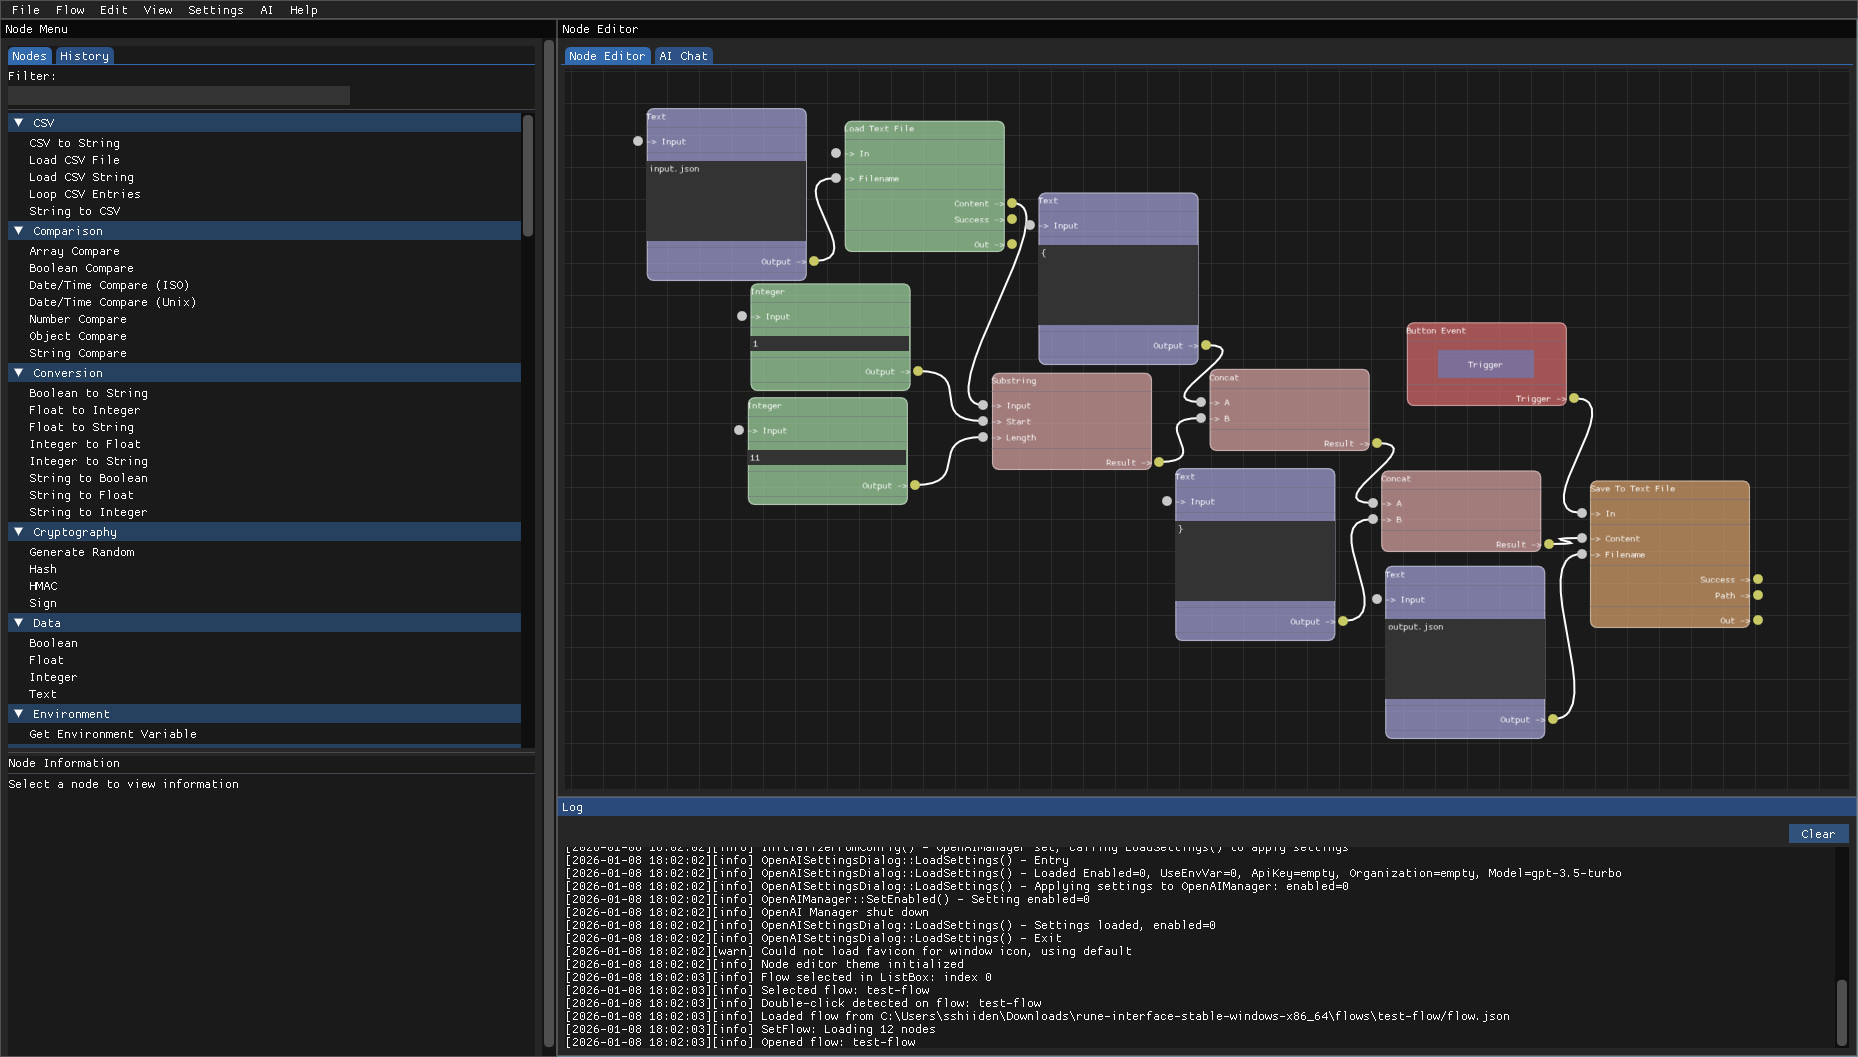
Node Menu (Left Side)
The left panel shows:
- Nodes Tab: Browse and search available nodes
- History Tab: View execution history and logs
Canvas (Right Side)
The main canvas is where you:
- Place nodes by dragging from the node menu
- Connect nodes with wires
- Configure node properties
Tabs (Top)
The main window includes several tabs:
- Flow Editor: The main canvas for building flows
- AI Chat: OpenAI chat interface for AI assistance (requires OpenAI configuration)
Menu Bar (Top)
The menu bar provides:
- File operations (New, Open, Save, Export)
- Flow execution controls
- Settings and preferences (including OpenAI Settings)
Basic Workflow
- Add a Start Node: Drag a
ButtonEventnode onto the canvas - this will be your entry point - Add Processing Nodes: Add nodes like
Text,SessionStateSet, orConsoleto process data - Connect Nodes: Click and drag from execution pins to connect the flow
- Configure Inputs: Click on nodes to set input values
- Run the Flow: Click the "Run" button or press the trigger button
Next Steps
- Learn about available nodes
- Explore the Luau API for scripting
- Set up OpenAI integration for AI-powered features
- Check out flow examples (coming soon)